Pages

Tuesday, March 12, 2019

Leaf Collection - Science

Plants

AIM: TO LEARN ABOUT THE NATURE OF PLANTS

Plants fall into two categories:

Evergreen:
Deciduous:

Image result for deciduous
Deciduous
Image result for evergreen
Evergreen


Find three examples of each:

Evergreen: 
1. Western Redcedar
2. Scots Spruce
3. Blue Spruce

Deciduous:
1. Maple
2. Oak
3. Larch 

LEAVES


Image result for simple leaf

                                      Simple                      Compound   

Example: 
Plant type: Deciduous / Evergreen
Leaf type: Simple / Compound
Leaf colour: Green
Photo of leaf: Image result for simple leaf
Plant drawing:Image result for tree drawing

MY LEAF COLLECTION


1.
Plant type: Deciduous 
Leaf type: Simple
Leaf colour: Green turning brown
Photo of leaf: 
Plant drawing: 

2. 
Plant type: Deciduous
Leaf type: Compound
Leaf Colour: Light Green
Photo of leaf: 
Plant drawing: 


3.  
Plant type: Evergreen
Leaf type: Compound
Leaf Colour: Yellow-Green
Photo of leaf:
Plant drawing: 

4. 
Plant type: Evergreen
Leaf type: Simple
Leaf Colour: Green and a little pink-ish
Photo of leaf:
Plant drawing: 

5.  
Plant type: Deciduous / Evergreen
Leaf type: Simple / Compound
Leaf Colour: Yellow-Green
Photo of leaf: 
Plant drawing: 


RESEARCH 4 TYPES OF PLANTS


Carnivorous plants
Pine trees 
Fruit trees
NZ Natives

Example

Title: NZ Natives
Examples: 
1. Manuka
2. Marbeleaf
3. Rimu
4. Kauri

Habitat: Where do they live?
Country: New Zealand
Climate: Moderately hot and cold

Title: Carnivorous Plants
1. Venus Flytrap
2. Sundew
3. Rafflesia
4. Cephalotus Follicularis

Habitat: Tropical Islands and Rainforest
Country: Southeast Asia, Australia, South Africa, and South America
Climate: Warm/Hot

Title: Fruit trees/plants
1. Black Plum Trees
2. Rambutan Trees
3. Cotton Fruit Trees
4. Aratilies Tree

Habitat: Tropical Island and Rainforest
Country: Philippines and Indonesia
Climate: Warm/Hot
Title: Pine Trees
1. Scots Pine
2. Pinus Patola 
3. Pitch Pine
4. Stone Pine 

Habitat: Tropical Islands and Rainforest
Country: Eurasia, Italy, Mexico.
Climate: Warm/moderate.

Friday, March 8, 2019

The 7 Types of crystals

The 7 types of crystals


Type
Number of sides
2 examples
Image
Triclinic
Definition:


6 sidesFeldspar, Rhodonite.Image result for triclinic crystal
Monoclinic
Definition:


6 sidesMica, Gypsum.Image result for monoclinic crystal
Orthombic
Definition:


6 sidesSulfur, staurolite.Image result for Hexagonal crystal
Trigonal
Definition:


6 sidesQuartz, Image result for Trigonal crystal
Hexagonal
Definition:


6 sidesCalcite, Sapphire, Image result for Orthorhombic crystal
Cubic
Definition:


4 sidesSugar, Salt, Halite, Galena.Image result for sugar crystal image
Tetragonal
Definition:


6 sidesZircon, Chalcopyrite.Image result for Tetragonal crystal
Explain how the following crystals are formed?


Type

Salt
As the water evaporates from the solution, atoms bond together. The also molecules bond together forming crystals. Every molecule will form the same shape every time it forms.

Sugar
While the water evaporates, the solution becomes saturated and sugar molecules will continue to come out of solution. The crystals grow by molecule by molecule.

Snowflakes
A snowflake forms when an extremly cold water droplet freezes onto a pollen or dust. This will create an ice crystal, and when the ice crystal falls to the ground. The water vapour freezes onto the primary crystal, building new crystals.

Tuesday, March 5, 2019

Crystals

Aim: To learn about a saturated solution and how to make crystals

Definition of a solution: 
A liquid mixture, when something is dissolved into a liquid (eg: sugar in water) 

Definition of saturated: 
Having or holding as much as can be absorbed of something (when no more sugar or borax can be dissolved into the water)

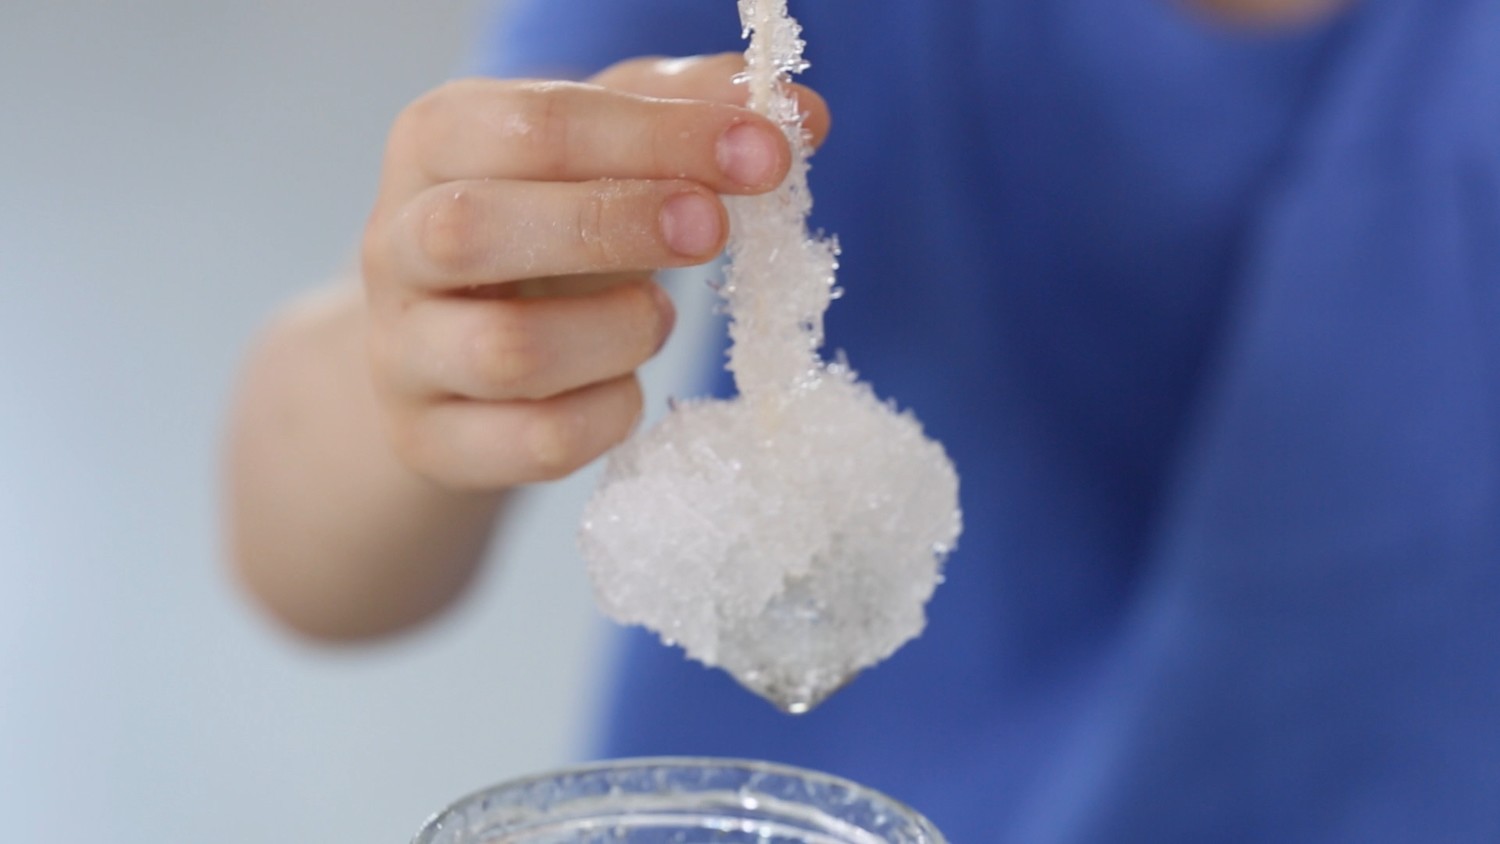
Borax Crystals: 

Image result for borax crystals

Materials:

1. Pipe cleaners
2. Hot water
3. Pegs
4. Spoon 
5. Container/Cup
6. 8 tsp Borax

Process: 

Step 1. Put 8 tsp amount of borax to your container/cup. 
Step 2. Pour hot water to the container don't fully fill it.
Step 3. Grab your spoon and stir. 
Step 4. When the borax has mixed with the hot water, take the spoon out and get your pipe cleaners and pegs.
Step 5. Make a star using your pipe cleaner.
Step 6. Clip the peg onto one of the legs of the pipe cleaner, hang the peg downwards so the pipe cleaner is hanging.

Sugar Crystals:

Grow your own Sugar Crystals

Materials:

1. Container/Cup
2. 8 tsp Sugar
3. Spoon
4. Pegs
5. Hot water 
6. Pipe cleaners

Process:

Step 1. Just like the borax crystals put 8 tsp amount of sugar to your container/cup.
Step 2. Pour hot water to the container don't fully fill it.
Step 3. Grab your spoon and stir.
Step 4. When the sugar has mixed with the hot water, take the spoon out and get your pipe cleaners and pegs.
Step 5. This time just clip the peg to the pipe cleaner.
Step 6. Hang the peg downwards so the pipe cleaner is hanging.

Salt Crystals: 
Image result for how to make salt crystals


Materials:

1. 8 tsp Salt
2. Pipe Cleaners
3. Container/Cup
4. Hot water
5. Spoon
6. Pegs

Process: 

Step 1. Just like the borax and sugar crystals. Put 8 tsp amount of salt to your container/cup.
Step 2. Pour hot water to the container don't fully fill it.
Step 3. Grab your spoon and stir.
Step 4. When the sugar has mixed with the hot water, take the spoon out and get your pipe cleaners and pegs.
Step 5. Just like last time just clip the peg to the pipe cleaner.
Step 6. Hang the peg downwards so the pipe cleaner is hanging.

Findings:

Crystal Type
Shape
(Describe the shape)
Size
(of individual crystals)
Hardness
(Crumbly to Rock Hard)
Borax


Cubic1 to 2mm in diameter Hard
Sugar


None but mostly cubicNo crystalsNo crystals
Salt


None but mostly cubic0.5 - 1mm in diameterCrumbly
What crystals worked out best and why?:

The borax had the most crystals and the salt had a little bit but it was crumbly. The sugar didn't have any crystals. The borax saturated more that's why it had the most crystals in it. If the sugar was more syrup like it would have made crystals. Although our one wasn't syrup like that's why it didn't work. 

Borax Crystal:

Salt Crystal:

Friday, March 1, 2019

Scones

Aim: To look at different kitchen ingredients in scones and their effects.

In groups of 4 you will: 


  • Make 4 types of scone. 
  • Normal plus 3 others.


1. No butter,
2. No Baking Powder
3. No milk
4. With Lemonade
5. With Baking Soda

Recipe for normal scone:

  • Milk
  • Baking Powder
  • Flour
  • Butter


Recipe for lemonade scone:

  • Lemonade
  • Baking Soda
  • Flour
  • Butter


Recipe: Baking Soda

  • Milk
  • Baking Soda
  • Flour
  • Butter


Materials: 

1. Bowl
2. Butter
3. Baking Flour
4. Milk
5. Flour
6. Baking Powder
7. Lemonade

Process: Normal Scones

Step 1: Get your bowl and add 1/2 cup of baking powder.
Step 2: Add 1 tsp of baking soda.
Step 3: Add 10g of butter.c
Step 4: Add 1/4 amount of milk on the bowl with the dry ingredients, add more milk if needed.
Step 5: Mix all ingredients, until you have the right consistency.
Step 6: Put dough in the oven.

Findings:


TRIAL NUMBER:

COLOUR

TASTE

HEIGHT (MM)

1. NORMAL

Pale yellow Creamy, A bit softer, a bit bland.42mm


2. NO BAKING POWDER

Brownish Raw in the middle, very floury, and has a weird taste.47mm

3. WITH LEMONADE

WhiteFloury, tangy, you can taste a little bit of lemonade but not much.44mm


Conclusion:
The scones were cooked for 10 minutes at 200o Celsius. The other recipes didn't taste really good, the worst scone for me was the scone with no baking powder. It was raw and very floury and didn't taste very good, it had a brownish colour and was 47mm high. The lemonade scone and was not so good either however it wasn't the worst one. It was colour white with a flory, tangy taste. I tasted a little bit of lemonade but not that much, it was 44mm high. The normal was the best scone because there was nothing added to it or removed. The colour of it was pale yellow and was a bit creamy, and softer. But it was also bland. The height of the normal scone was 44mm.